The Jupiter 6, like many other synthesizers of its generation, was made to backup its patch settings onto an audio cassette recorder.
The patch settings exist inside the Jupiter as a sequence of 1's and 0's. To accomplish the task of getting those digits into a cassette, the Jupiter is designed to create a waveform, with a frequency in the audio range, and then send it via audio to a cassette recorder, which is designed to record audio waveforms.
The waveform consists simply of long and short pulses. The Jupiter converts its 1's to long pulses, and it's 0's to short pulses. It then plays them, sequentially, as a pulse wave form, which the cassette recorder can pick up.
It's like morse code... the combination of long and short pulses.
When you restore from the cassette backup, you play the waveform back to the Jupiter, which detects long and short pulses, and then stores them in memory as 1's and 0's again, after a bit of error checking. There are about 20,000 such pulses in the 6 seconds of backup, so the procedure happens really quickly.
On the Jupiter, The pulse lengths of a long pulse are 500uS, and the pulse length of a short pulse lasts 125 uS. uS stands for microseconds, of which there are 1 million in a second... meaning that a "long" pulse is perhaps a bit of a misnomer. For example, it takes light about 5 Usecs to travel a mile... so light itself could only go about 100 miles in the duration of a "long" pulse.
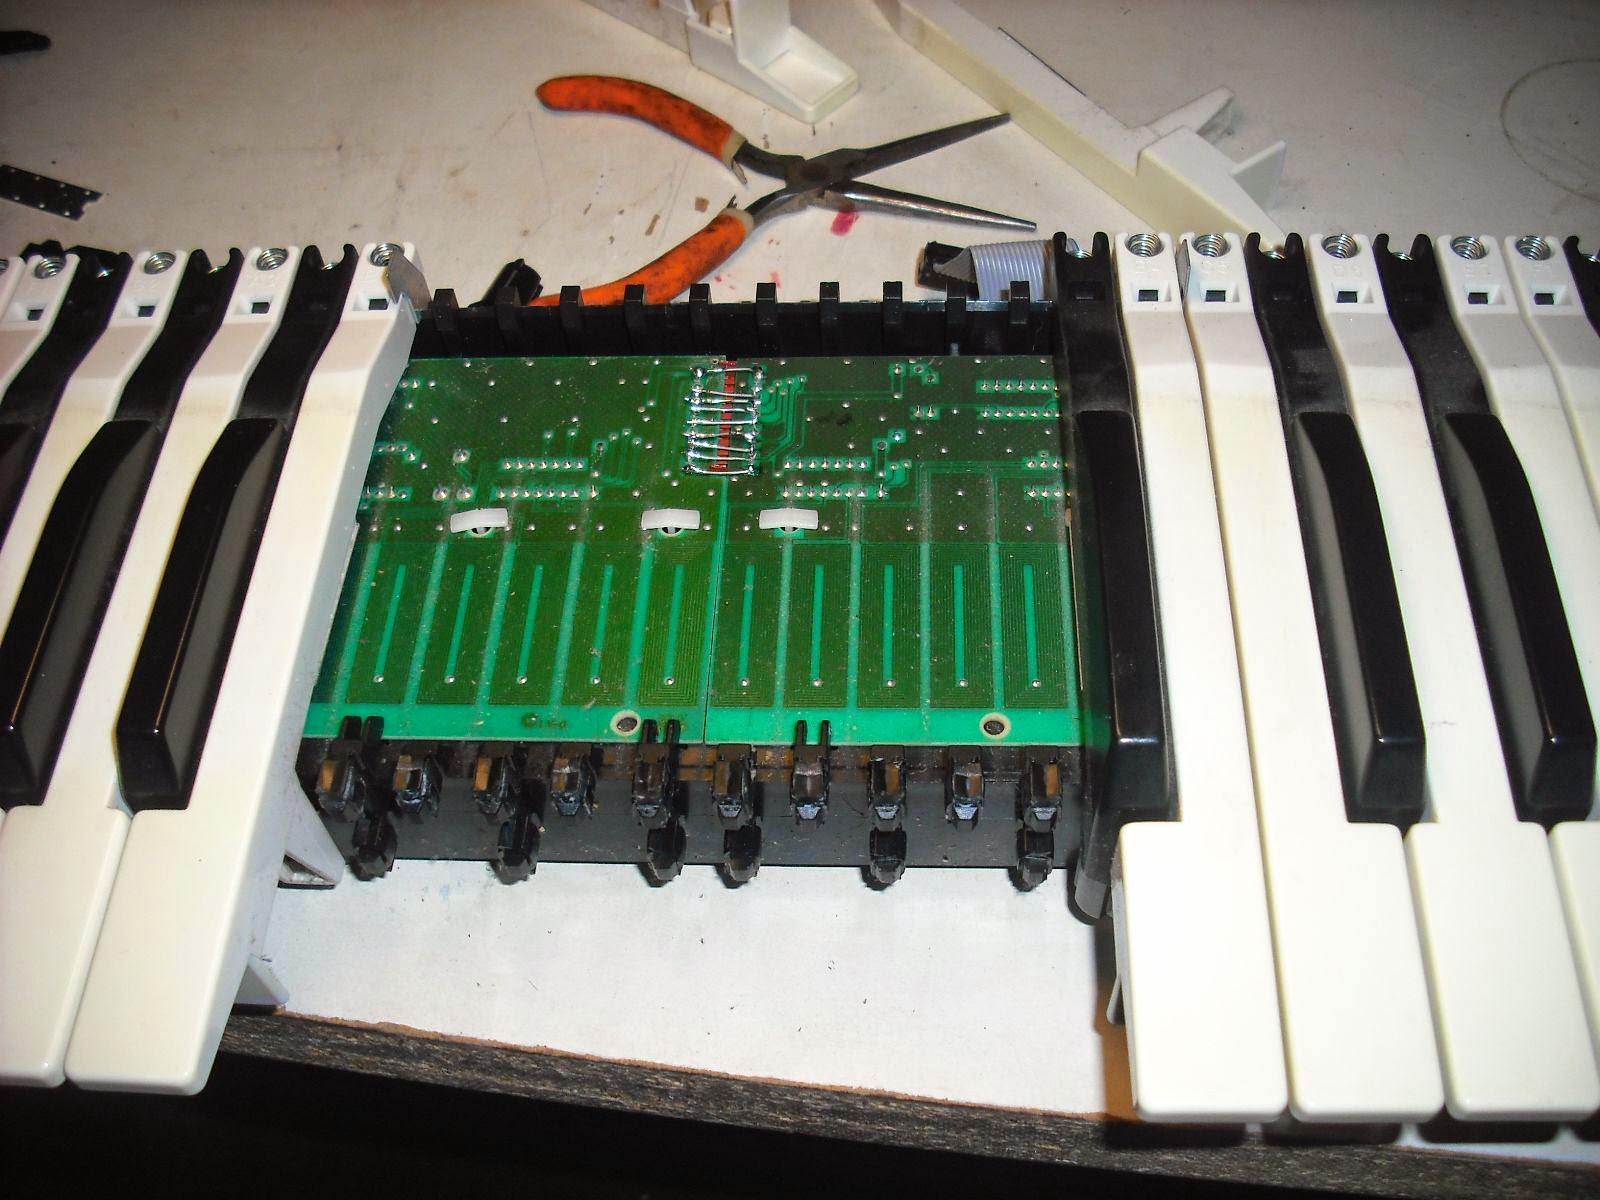
From the photo above, (taken from the Jupiter service manual, it is also obvious that a digital "1" could be comprised of a pulse that lasts for 500 uSec at 0 volts, or a pulse that lasts for 500 uSec at 5 volts.... it is not the amplitude or phase of the pulse that determine its digital value, but simply the duration.
Below is an audio recording, from audacity (a great free audio recording application for windows or Linux), of a real Jupiter 6 backup. I zoomed in considerably so that the individual pulses can be seen. Remember that these are going by really fast, you will get about 20,000 of these in pulses 5 seconds, so the view below is zoomed in considerably.
Reading from left to write, at the first y axis crossing, we have a digital 1, then 0,0,1,0,1,0,1,0,1,0,0,0.
We are just reading the time between zero crossings, we don't care if the pulse is above or below the x axis.
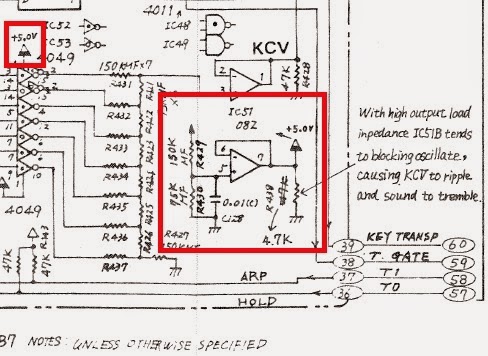
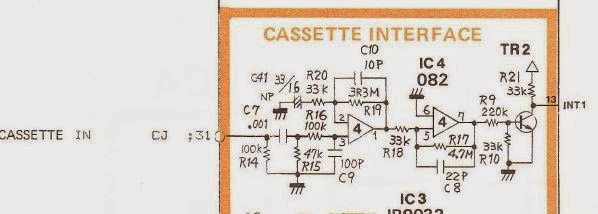
You will notice that the pulses shown are somewhat rounded and not nice and square. This is because this is the audio version, so in order to get to nice square waves from these rounded ones, when they are sent into the tape load jack, the Jupiter uses the circuit below to convert the wave into square pulses that can be easily timed digitally.
This circuit comprises an op amp and some capacitors to achieve nice square pulses. It works from left to write and ultimately sends the data to pin 13 of the CPU (intel 8051). This is an interrupt pin on the processor, and when in tape Load mode, the processor times the microseconds between the pulses, determines if each is a 0 or a 1, and stores the data in RAM bit by bit.
The data on the audio recording all starts with a "leader tone", a series of 1's (500 usec pulses) that lasts for a few seconds. Not much is needed, but the Jupiter uses this to recognize that data is coming.
In this project, I used an Arduino UNO to digitally record the data coming in on pin 13 of the microprocessor, and timed each individual pulse. I was then able to establish a threshold to determine which pulses were short and long. I was able to store that binary data on an SD card, and I was then able to play it back directly to the microprocessor (at pin 13), and therefore load the sounds digitally (without the use of the audio recording).
The purpose in doing this was so that I could clean up an unusable backup. Apparently, on the backup, some of the short pulses were not short enough, so that they were confused with long pulses. This created issues with reading the backup into the microprocessor. By recording the pulselength of each individual pulse, I was able to play around with the threshold between long and short pulses and consequently restore the backup to the Jupiter 6 digitally.
Below is the setup and coding I used to achieve this; it consists of an arduino Uno (a programmable microprocessor), an SD card reader (to store the data), and an extra 32k of ram on a breakout board that I had to construct as a buffer to store the data (couldn't record it to the SD card directly, it comes in too fast!).
 |
| The Arduino is shown in the middle, the add-on SD reader to the right, and on the left is the SPI ram breakout board I constructed. |
One would think that the modern SD card is super fast, however it is made to store bigger chunks of data at a time... so I needed a buffer to cache the data as it came in from the backup. Once the backup process is complete, I could then write the data to the SD card for storage and manipulation.
To achieve the necessary buffering on the Arduino, I added 32k of SPI RAM using an 8 pin DIP chip 23K256 mounted on a perfboard (above left). Some code which contains some nice workable subroutines for accessing memory in RAM is located
here. One obstacle which I had to overcome was that the chip I was using is a 3.3 volt chip, and the Arduino uses 5 volt TTL logic levels. Going from the chip to the arduino was fine (a 3.3 volt "high" is high enough to register as "high" on the 5 volt arduino, however to get signals from the Arduino to the chip I had to employ voltage dividers. I used 3 equal value (220 ohm) resistors in series on each of those lines, connecting the 5 volt input to one end of the voltage divider and ground to the other. I then got my 3.3 volt output from between the 1st and 2nd resistors. It therefore dropped the level from 5 volts to 3.3, which is easy to do with 3 equal resistors since 3.3 is 2/3 of 5. I used 220 ohm resistors. There is a good discussion of this topic
here. It is important to use values of resistors low enough to preserve the integrity of the signal, it seems higher resistances above 1k or so can distort the signals.
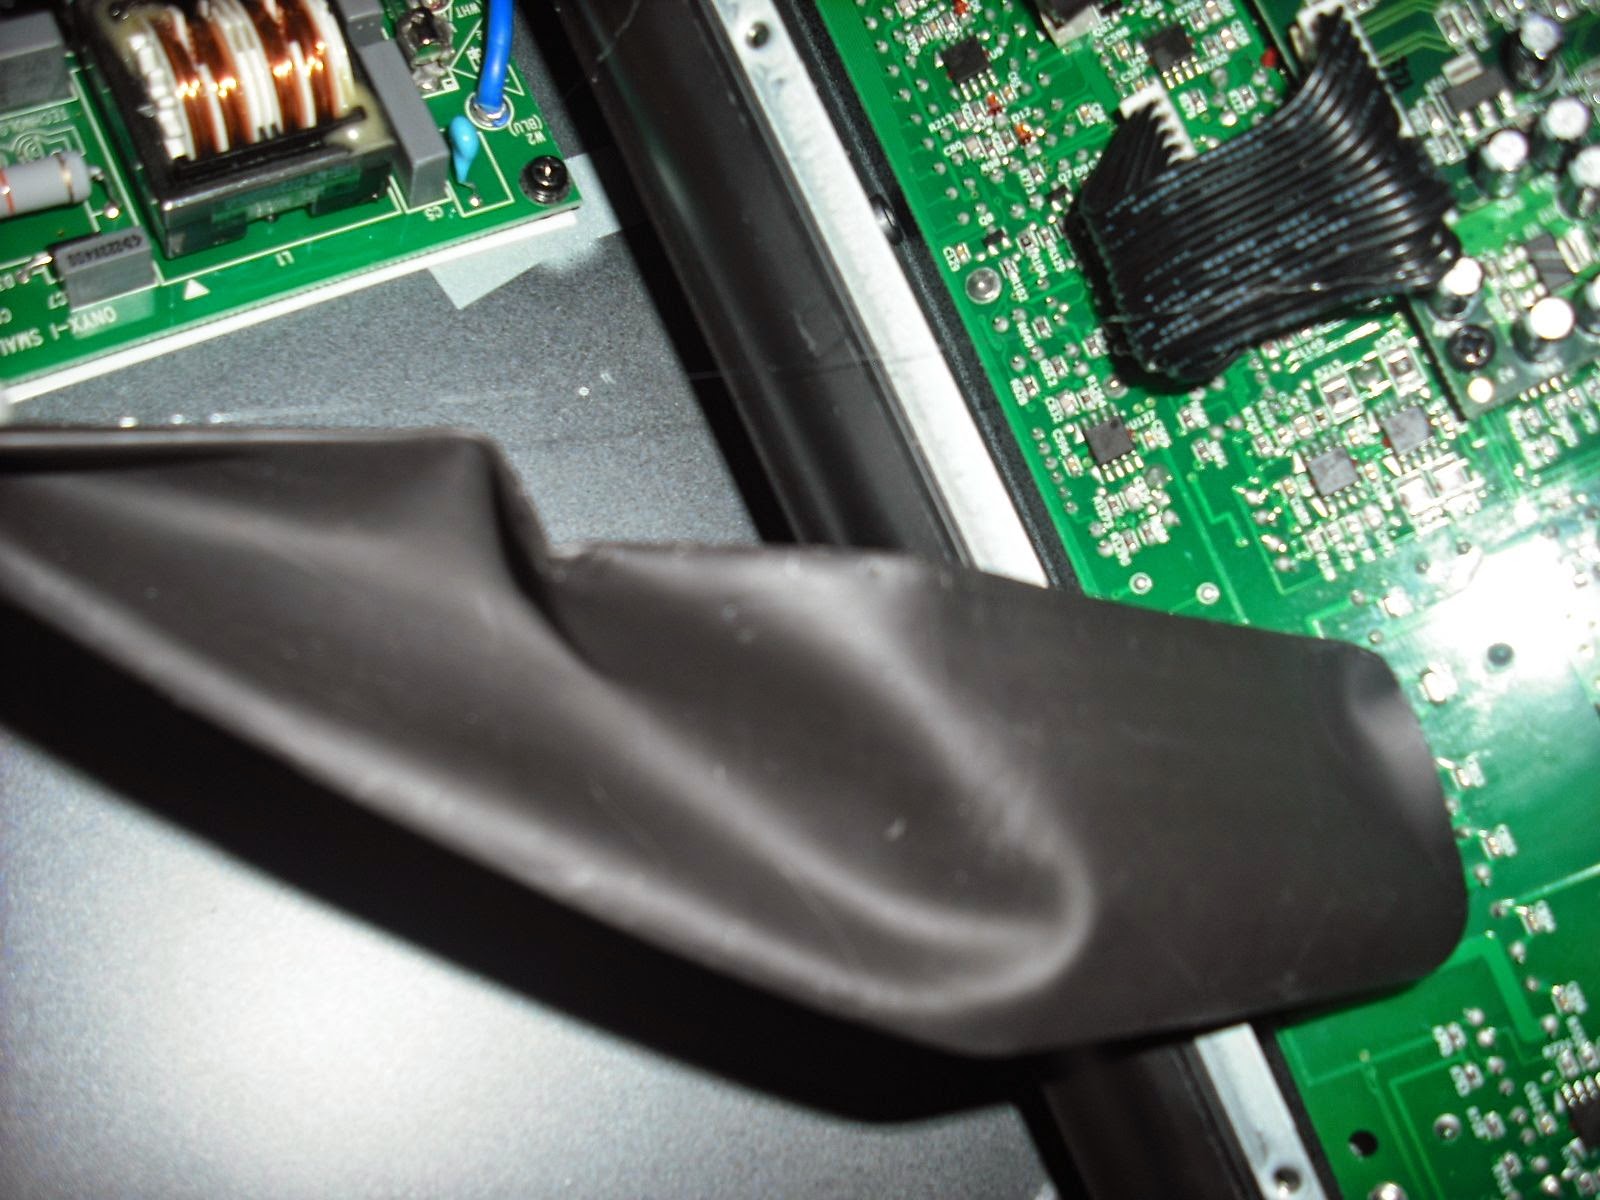
The next step was to physically attach an input pin on the arduino to the signal coming from the Jupiter... that is, to pin 13 of the microprocessor. This is because I wanted to have the signal pass, first, through the circuitry which converts the signal into a square wave. I had already assured that these components were working.
 |
| I tapped pin 13 on the 8051 processor to record the pulselengths as they came in. I used the same pin to send them back. A humble 4 wire phone cable did the trick of connecting the processor to the ardunio. |
Next I routed that data to a pin on the Ardunio which I configured as an input pin.
The code I wrote to record, manipulate, and ultimately play back the data, is all below at the bottom of the page. The recording loop consists of a pair of "while" loops, one for a high pulse and one for a low pulse. Each one continually records the length of time the pin has been in its current state until the pulse ends. The last time recorded in each while loop can be considered the pulse length. (You will note I divided the pulselengths by 4. This reduced accuracy, but I needed to fit the pulselength into one byte of data due to the limitation of Ram I had available.
One of the more interesting things I learned in writing this portion of the code is to optimize it so that the busy work is done right after the pin state changes. This is because we have the most time at that point, and we can delay readings for a few microseconds while we write the data to ram, as we can be confident at that time that the pulse will last for a while. Accessing the serial ram does incur a slight delay, so that's why I wrote the pulselength for the previous pulse to the serial ram just after each new pulse had begun.
This code worked flawlessly (after a bunch of revisions), and at the end of the 6 seconds of recording I had a long list of 20000 or so pulselengths.
The next step was to arrange the data in a spreadsheet, and find out what a good threshold would be between long and short pulses.
I found a threshold vaule by assigning a number to each pulse, so that I could later reconstruct them in sequence, and then sorted the spreadsheet by pulselength ascending. I could then see that there were no pulses in a long range of data... so I found the median of this empty range and called it the threshold.
Next, was able to apply this threshold to my arduino program, and prepare a new series of 1's 0's, and simply play it back to the Jupiter 6 to the same pin I recorded it from.
This was accomplished by writing another section of arduino code. This code loaded all the 1's and 0's it plans to write into Ram first, for faster access. It then writes a high pulse, and then pauses until the duration of the pulse comes up (500uS or 125 uS). It then writes the next pulse, and after writing it it figures out when to end it, and then writes that pulse. Once again, the code was arranged so all the calculations and RAM reads were done right after writing each pulse, when there is the most "free time".
It worked! I believe that it worked because my arduino was able to write super accurate pulselengths to the processor, and because I was able to determine a good threshold and then structure all the pulses accurately... the short ones were exactly 125 uS and the long ones exactly 500 uS.
All the code is below. It was written hurriedly... obviously if this was made for production there could be a lot of cleanup and optimization done. Also below is a small video of the procedure working... notice the lights going on and off, indicating a successful load!
=========================================
Arduino C++ code below:
//all includes HERE
#include
#include
//all Defines HERE
#define SRAM_DEVICE 5 // SRAM on pin 5
#define SRAM_READ 0b011 // Read data from memory array beginning at selected address
#define SRAM_WRITE 0b010 // Write data to memory array beginning at selected address
#define SRAM_RDSR 0b101 // Read STATUS register
#define SRAM_WRSR 0b001 // Write STATUS register
// operation modes (status register)
#define SRAM_BYTE_MODE 0b00000000 // Byte mode (default operation)
#define SRAM_PAGE_MODE 0b10000000 // Page mode
#define SRAM_SEQN_MODE 0b01000000 // Sequential mode
#define SRAM_RSVD_MODE 0b11000000 // Reserved
#define SRAM_HOLD_MODE 0b00000001 // Set this bit to DISABLE hold mode
//all global variables HERE
char strValue[5];
int incoming = 0;
void setup(){Serial.begin(115200);
delay(1000);
pinMode(5,OUTPUT);// to set up ram
pinMode(2,INPUT);//set up input pin
SPI.begin ();
sram_setup (SRAM_DEVICE);
pinMode(10, OUTPUT);
//noInterrupts();
if (!SD.begin(4)) {
Serial.println("initialization failed!");
return;
}
}
void loop(){
Serial.println("***********************************");
Serial.println ("Welcome to Pulse R/W application!");
Serial.println (".....");
Serial.println ("Select an option:");
Serial.println ("001... Read Pulse Code");
Serial.println ("002... Translate raw.txt to bin.txt");
Serial.println ("003... Write bin.txt to device");
Serial.println ("004... Read BIN to RAM");
Serial.println ("005... Read RAW to RAM");
Serial.println ("006... Write a 1 or 0 to RAM");
Serial.println ("Enter a choice!");
while (Serial.available()>0){
for (int index = 0; index < 4; index++){
char ch = Serial.read();
strValue[index] = (ch);}} // add the ASCII character to the string;
strValue[4] = '/0'; // terminate the string with a 0
incoming = atoi(strValue); // use atoi to convert the string to an in
Serial.println(incoming);
if (incoming == 1){recorder();}
if (incoming == 2){translator();}
if (incoming == 3){writer();}
if (incoming == 4){readBINtoRAM();}
if (incoming == 5){readRAWtoRAM();}
if (incoming == 6){write1ToRAM();}
Serial.read();
while(Serial.available()==0){};
}
//++++++++++++++++++++++++++++++++++++++++++++++++++++++++++++++++++++++++++++++++++++++
// do the recording and write to xRAM 0-28000
void recorder(){
countdown();
byte pulseLength =0;//variable to store pulse length
long i = 0;//variable to define RAM address to write to START AT 0!!!
boolean currentPinState = 1;
while (digitalRead(2) == 0){}//pause until data has started
unsigned long initMicros = micros();
//*********************************************************************
//RECORDING LOOP
for(i=0;i<28000 br="" i="">
// delayMicroseconds(350);
while (currentPinState == 1){ //do this while the pin is high
pulseLength = ((micros() - initMicros)/4); //this will keep writing the length of the pulse until the pin goes low,
currentPinState = digitalRead(2); //checks if the pin is still high, if so, repeat this "while loop" and record a higher value of micros for length
//currentPinState = 0;
}
initMicros = micros(); //if the above "while" loop has stopped, the pin must be low, so record the micros at the beginning of the new 0 pulse
sram_write (SRAM_DEVICE, i, &pulseLength, 1);//command to write to RAM at address i
i = i+1; //increment the counter, so that the length of this pulse that just started (a zero pulse) will be recorded in the next position of the array
//delayMicroseconds(350);
while (currentPinState == 0){ //while the pin is in a low state
pulseLength = ((micros() - initMicros)/4);//get the micros of the length of the low pulse, write it to the array
currentPinState = digitalRead(2); // check the pin state again, and if it is still low, run the above while loop again, adding a higher and higher micros value each time
//currentPinState = 1;
}
initMicros = micros(); //get micros at beginning of 1 pulse which has just started
sram_write (SRAM_DEVICE, i, &pulseLength, 1);//command to write to RAM at address i
}
dumpRAMtoSD();
Serial.println("finished!");
return;
}
//******************************************************************************************************
void sram_setup (const byte device)
{
digitalWrite (device, LOW); // select device
SPI.transfer (SRAM_WRSR);
SPI.transfer (SRAM_SEQN_MODE);
digitalWrite (device, HIGH); // deselect device
} // end of sram_setup
//******************************************************************************************************
// write 'length' bytes from 'data' to device at address 'address'
void sram_write (const byte device, unsigned int address, byte * data, unsigned int length)
{
if (length == 0) // don't bother if nothing to do
return;
digitalWrite (device, LOW);
SPI.transfer (SRAM_WRITE); // write mode
SPI.transfer (address >> 8); // high-order address byte
SPI.transfer (address & 0xFF); // low-order address byte
for ( ; length ; --length)
SPI.transfer (*data++); // data byte
digitalWrite (device, HIGH); // deselect device
} // end of sram_write
//+++++++++++++++++++++++++++++++++++++++++++++++++++++++++++++++++++++++++++++++++++++++++++++++++++++++++
// read 'length' bytes into 'data' to device from address 'address'
void sram_read (const byte device, unsigned int address, byte* data, unsigned int length)
{
if (length == 0) // don't bother if nothing to do
return;
digitalWrite (device, LOW); // select device
SPI.transfer (SRAM_READ); // read mode
SPI.transfer (address >> 8); // high-order address byte
SPI.transfer (address & 0xFF); // low-order address byte
for ( ; length ; --length)
*data++ = SPI.transfer (0); // data byte
digitalWrite (device, HIGH); // deselect device
} // end of sram_read
//==========================================================================================================
void dumpRAMtoSD(){ //Reads all byte data in addresses 0 - 28000 and writes them to raw.txt on SD CARD
//setup SD CARD
pinMode(10, OUTPUT);
byte pulseLength;
// if (!SD.begin(4)) {
// Serial.println("initialization failed!");
// return;
//28000 }
File dataFile = SD.open("raw.txt", FILE_WRITE);
for (int i=0;i<28000 br="" i=""> sram_read (SRAM_DEVICE, i, &pulseLength, 1); //reads at address i and writes it to pulseLength.
//Serial.println(pulseLength);
dataFile.println(pulseLength);//****
delayMicroseconds(10);
Serial.println(pulseLength);}
dataFile.close();
Serial.println("completed!");
return;}
//==========================================================================================================
void write1ToSd(){
byte pulselength = 1;
File dataFile = SD.open("bin.txt", FILE_WRITE);
for (int i=0; i<10 br="" i=""> dataFile.println(pulselength);
dataFile.close();
Serial.println("done, go to BED!");
return;}}
//+++++++++++++++++++++++++++++++++++++++++++++++++++++++++++++++++++
void dumpRAMtoSD2(){ //Reads all byte data in addresses 0 - 28000 and writes them to raw.txt on SD CARD
//setup SD CARD
pinMode(10, OUTPUT);
byte pulseLength;
File dataFile = SD.open("bin.txt", FILE_WRITE);
for (int i=0;i<28000 br="" i=""> sram_read (SRAM_DEVICE, i, &pulseLength, 1); //reads at address i and writes it to pulseLength.
//Serial.println(pulseLength);
dataFile.println(pulseLength);
delayMicroseconds(10);
}
dataFile.close();
Serial.println("completed!");
return;}
//============================================================================================================
void translator()
{
int threshold = getInput();
//setup SD CARD
byte pulseLength;
byte isLongPulse;
// convert pulselength data in RAM from raw to 1's and 0's
for(int i=0; i<28000 br="" i=""> sram_read(SRAM_DEVICE,i,&pulseLength,1);
if (pulseLength > threshold){isLongPulse = 1;}
if (pulseLength < threshold){isLongPulse = 0;}
Serial.println(isLongPulse);
sram_write(SRAM_DEVICE,i,&isLongPulse,1);
}
dumpRAMtoSD2();
return;
}
//++++++++++++++++++++++++++++++++++++++++++++++++++++++++++++++++++++++++++
void countdown(){ Serial.println("Activated!");
//delay 5 seconds
Serial.println("Beginning in 5 seconds!!");
delay(1000);
Serial.println("4");
delay(1000);
Serial.println("3");
delay(1000);
Serial.println("2");
delay(1000);
Serial.println("1");
delay(1000);
return;}
//============================================================================
void writer(){
long leaderCycles = 3000;//about 1000 per second
long initmicros = 0; //micros at pin change
long currentmicros = 0; //micros count
int pulseLength = 0; //the length of the pulse to generate
byte longpulse = 0; //if this is a long pulse, then it will be 1, else 0
long pulseEndTime = 0;
pinMode(2,OUTPUT);
countdown();
//generate leaderTones
for (long i=0; i < leaderCycles; i++){
digitalWrite(2,HIGH);
delayMicroseconds(500);
digitalWrite(2,LOW);
delayMicroseconds(500);}
//leader tone finished
digitalWrite(2,HIGH);
pulseEndTime = micros();//get micros right at start of this loop
for (int x =0; x < 28000; x++){
digitalWrite(2,HIGH);
sram_read (SRAM_DEVICE, x, &longpulse, 1);
if (longpulse){pulseLength = 500;}
else{pulseLength = 125;}
pulseEndTime = (pulseEndTime + pulseLength);//get the time to stop the hight pulse
while (micros()
digitalWrite(2,LOW);//start low pulse
x++; //increment counter
sram_read (SRAM_DEVICE, x, &longpulse, 1);
if (longpulse){pulseLength = 500;}
else{pulseLength = 125;}
pulseEndTime = (pulseEndTime + pulseLength);//get the time to stop the current LOW pulse, the length of time of the pulse + the time the last pulse ended
while (micros() }
Serial.println("COMPLETED!");
return;
}
//+++++++++++++++++++++++++++++++++++++++++++++++++++
int getInput()
{char StringIN[4];
int incoming2 = 1234;
Serial.println("Enter threshold");
while(!Serial.available()) ;
while (Serial.available()>0){
for (int index = 0; index < 4; index++){
char ch = Serial.read();
delay(100);
StringIN[index] = ch; // add the ASCII character to the string
}}
StringIN[4] = '/0'; // terminate the string with a 0
incoming2 = atoi(StringIN); // use atoi to convert the string to an in
Serial.println(incoming2);
Serial.flush();
int threshold = incoming2;
return(incoming2);}
//++++++++++++++++++++++++++++++++++++++++++++++++++++++
void readBINtoRAM(){
pinMode(10, OUTPUT);
byte pulseLength;
File dataFile = SD.open("BIN.TXT", FILE_READ);
for (int q=0;q<28000 br="" q="">
pulseLength = (dataFile.read()-'0');
dataFile.read();
dataFile.read();//get rid of the 2 line break characters
// if (fileByte == '/n'){i--;}
Serial.println(pulseLength);
//put fileByte into ram at address i,
sram_write (SRAM_DEVICE, q, &pulseLength,1);}
Serial.println("COMPLETED!");
dataFile.close();
return;}
//+++++++++++++++++++++++++++++++++++++++++++++++++++++++++++++++++++
void readRAWtoRAM(){
pinMode(10, OUTPUT);
byte pulseLength;
File dataFile = SD.open("RAW.TXT", FILE_READ);
for (int q=0;q<28000 br="" q="">
pulseLength = (dataFile.read());
dataFile.read();
//what I need to do is read the first, second, and (possibly 3rd chars until I get to line break and the other thing
//then combine those 3 or 4 into an integer, and then convert that integer into one byte.
Serial.write(pulseLength);
//put fileByte into ram at address i,
sram_write (SRAM_DEVICE, q, &pulseLength,1);}
dataFile.close();
Serial.println("COMPLETED!");
return;}
//+++++++++++++++++++++++++++++++++++++++++++++++++++++++++++++++++
void write1ToRAM(){
int address = (getInput());
byte oneByte = 1;
byte readByte = 0;
SPI.begin();
sram_setup(SRAM_DEVICE);
sram_write(SRAM_DEVICE,address,&oneByte,1);
Serial.println("completed. The data at position ");
Serial.println(address);
Serial.println("is now...");
delayMicroseconds(1000);
sram_read(SRAM_DEVICE,address,&readByte,1);
Serial.println(readByte);
return;}


