Tuesday, May 20, 2014

Flat flexible cables: what to do when you encounter a broken one, or when you loose the little wedge that holds them in their socket:

Although often called a ribbon cable, this type of cable is actually an FFC, a flat flexible cable. Most of these cables are not unique, at least most of the ones I have encountered have an amount of contacts divisible by 10, and have either a .5 mm or 1 mm "pitch", which is the amount of space between the center of one contact to the center of the other.

They can be cut with a nice sharp pair of scissors, useful if you have encountered one where the end is a bit damaged, but may have enough conductive material left on it that you can fix it by just shortening it a bit. They can also be carefully cut vertically, if you have one that has too many wires ( is too wide).

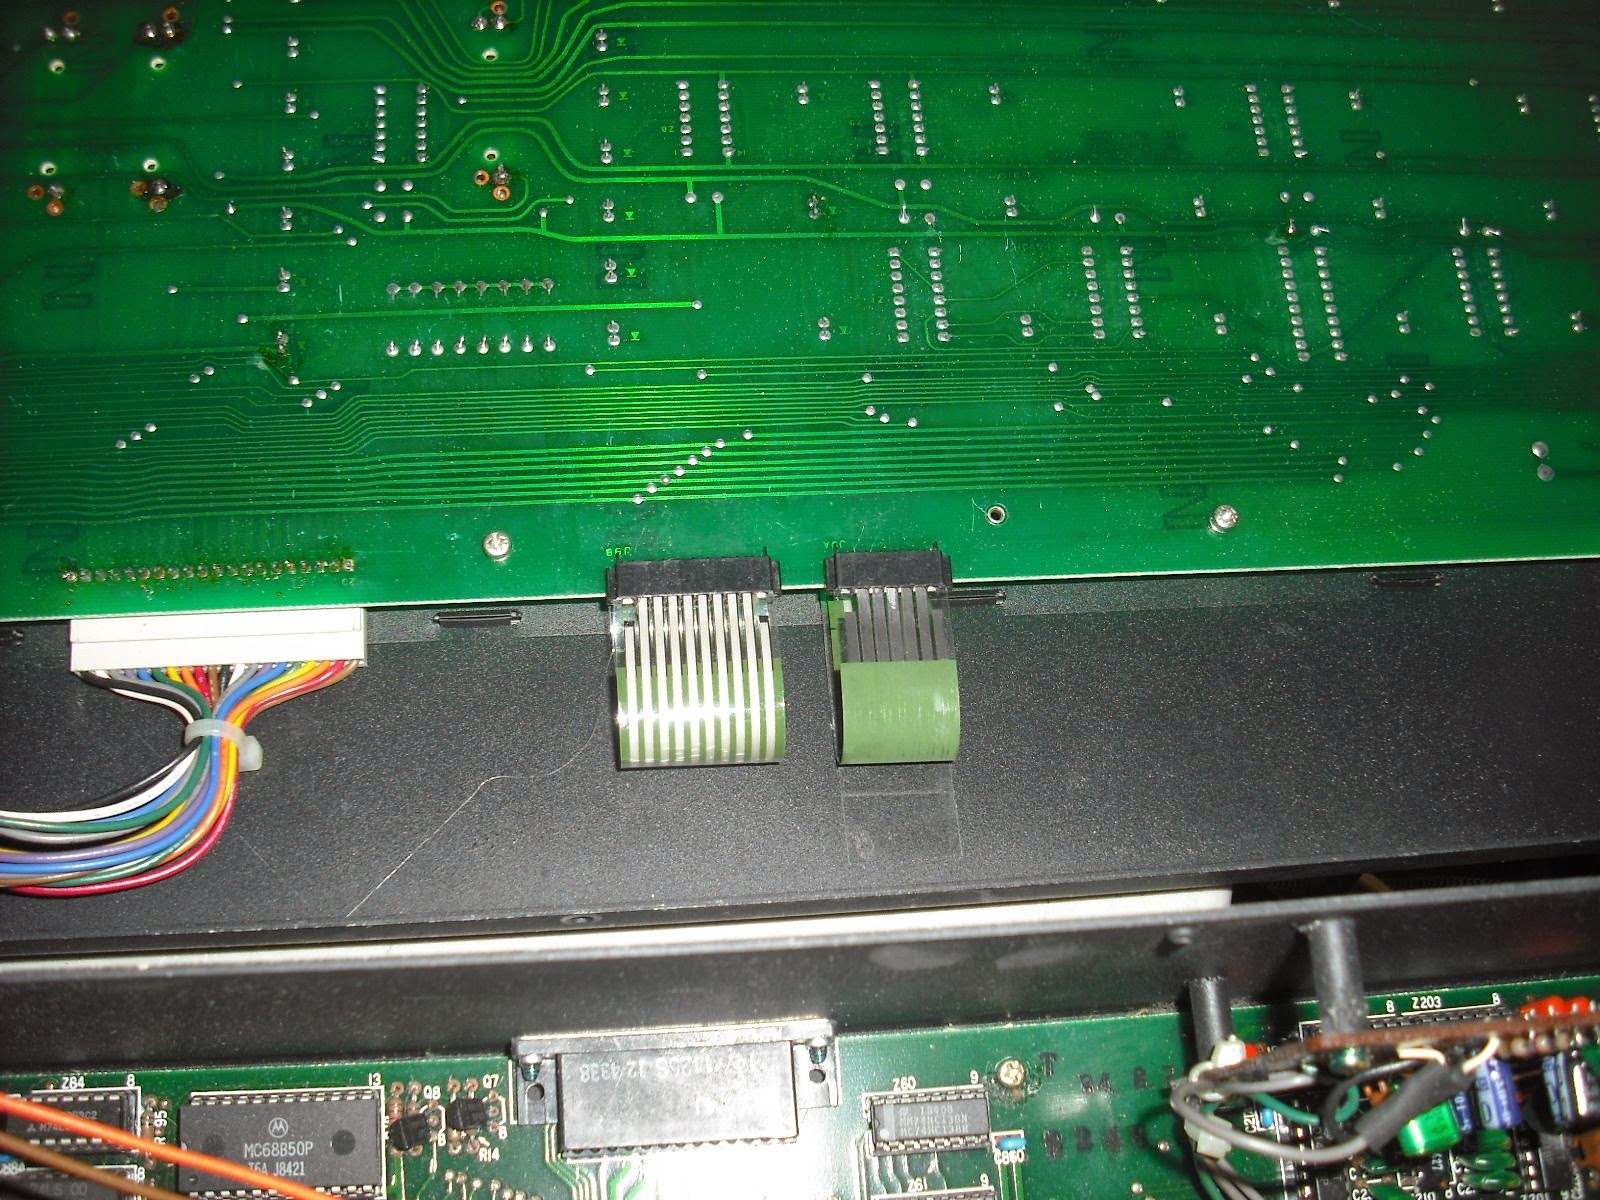
On a few occasions I have received items for repair where the little wedge, that holds the ribbon cable into the socket, has been lost. That's a mistake I just don't make anymore... but many do.

I have had some success buying full replacement sockets from digikey and stealing the wedge (I think it's called a slide lock). The replacement sockets are not hard to find, as long as you have the correct number of contacts on the cable ends, and the right pitch, you may very likely find that exact socket for sale, and then use its wedge.

Of course, counting the number of contacts on the end of a tiny ribbon cable is kind of a pain.

When I have to do something like that, I take a nice digital picture of it, then blow it up on my computer screen, so I can slowly move my mouse over it and count out loud while I do it.


Sunday, May 18, 2014

Chroma Polaris Membrane Repair


While repairing a Chroma Polaris, I was forced to disconnect the ribbon connectors (technically FFC connectors) that connect the membrane to the panel PCB's. To my horror, even though I was being painstakingly gentle and slow, one of them tore, almost immediately, as soon as I tried to move it

Additionally,  the other 3 connectors -which didn't break as the first one did- still became cracked and intermittent when they were unbent from the position they had been resting in for 35 years.

In all cases, the cables broke where they had been bent... fairly close to the socket.

To repair the situation, I was able to cut the damaged portion off with scissors, and then grind away the insulating material (from the black side, not the silver side) with a wire brush attached to a dremel.


This may seem barbaric, but it actually worked flawlessly. ( I practice on the discarded portion of the ribbon cable first). You just need to buff it just enough so that you are able to ring through the traces on the ribon cable with your multimeter. If you buff it too much, you will grind through the conductive material, and render it useless. So you have to buff, and test, buff and test, until it rings through. It is naturally a good idea to practice first on the discarded portion of the ribbon cable.


On 3 of the connectors, I didn't have to shorten the cables too much, and they still stretched to their sockets


. On the 4th, I had to install a few wires and actually move the socket closer to the cable.

Either way, the repair has seemed to be permanent and hopefully the membrane will last another 30 years, especially if it is undisturbed. An additional step may be to recoat the exposed conductive part with conductive epoxy or paint; however it did not seem required in this situation.

One additional note: these flat ribbon cables are actually called FFC's, flat flexible cables. They are not called ribbon cables at all. Ribbon cables, technically, are made up of many insulated wires attached to each other. If these break, it is much easier to repair them. I am going to put up another post discussing FFC cables.

I also recapped the power supply and replaced a few faders.


AXIOM 49 with dead midi output


I posted this unit on the blog because it's failure was caused by a most unlikely culprit: a failed ceramic capacitor which was used to filter out noise on the midi output. Although I encounter countless failed aluminum capacitors, I rarely (if ever) have encountered a failed ceramic capacitor.

Nevertheless, this was the case here.

The unit came to me because the midi out was failing, it was completely dead. Of course I checked the jack and the connections around it, and all seemed fine. I reset the software.

Just for a lark, I removed the tiny small value capacitor that filtered the midi out line to ground, and found that the midi out came right back.

Although the capacitor did not read as shorted, it's capacitance must have drifted and increased significantly, enough to actually be filtering out the midi signal, rather than just noise.

It was a 220 PF cap, shown below, and the unit worked fine when it was removed, and continued to work fine when a new one was installed. The second picture shows the area where the cap was located... I believe labelled C4 on the silkscreen.